
A Home for the Site on GitHub
This Part
By the end of this part, you will have a real website that opens on your phone. There is not much on it yet and it looks plain, but it is on the internet and it is yours. You do not need AI for this, only a few clicks.
What GitHub Is
GitHub is a website where you can keep files. Every change made to the files is recorded there, and if something breaks one day, you can go back to the previous version. GitHub also builds a website from the files you keep in it, and for a site like a practice website this is free.
The full guide to working with GitHub, from creating an account to connecting AI to it, is in Promptologist Appendix 2. If you have read it, most of what this part covers will feel familiar. If you have not, do not worry; everything you need for this part is said here.
Create an account
Open github.com and click Sign up. GitHub asks you for an email, a password and a username.
Choose the username carefully, because it will appear in your site’s temporary address. Pick a simple one in lowercase English letters, for example your own name. DentCast’s GitHub account name is dentcast-hub. If you already have an account, sign in with Sign in.
Create a repo
A repo is a folder in GitHub where the files of one project are kept. Your site’s files will also stay in a repo.
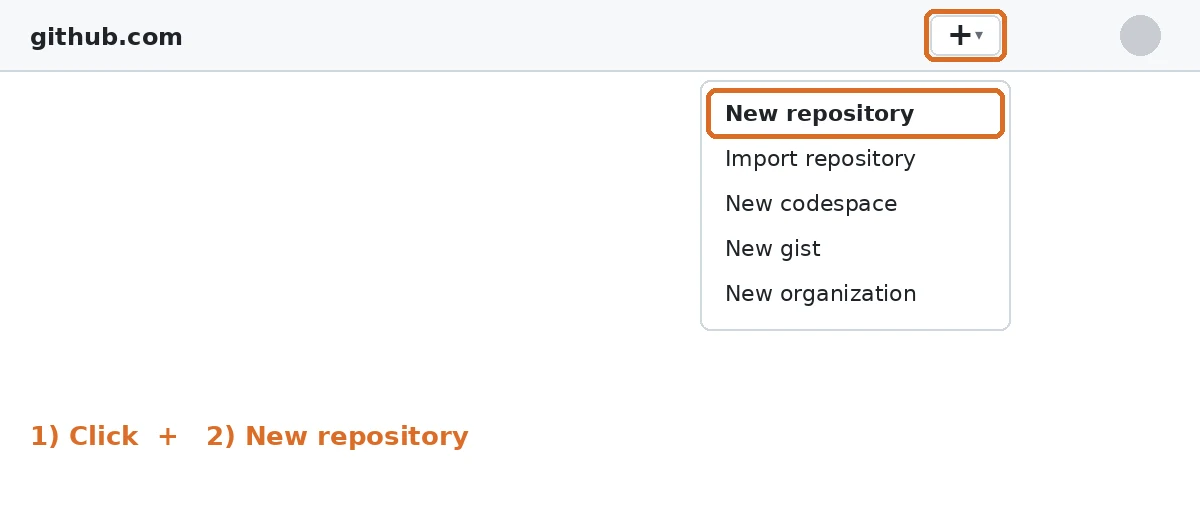
After signing in, click the + icon at the top right of the page and choose New repository.
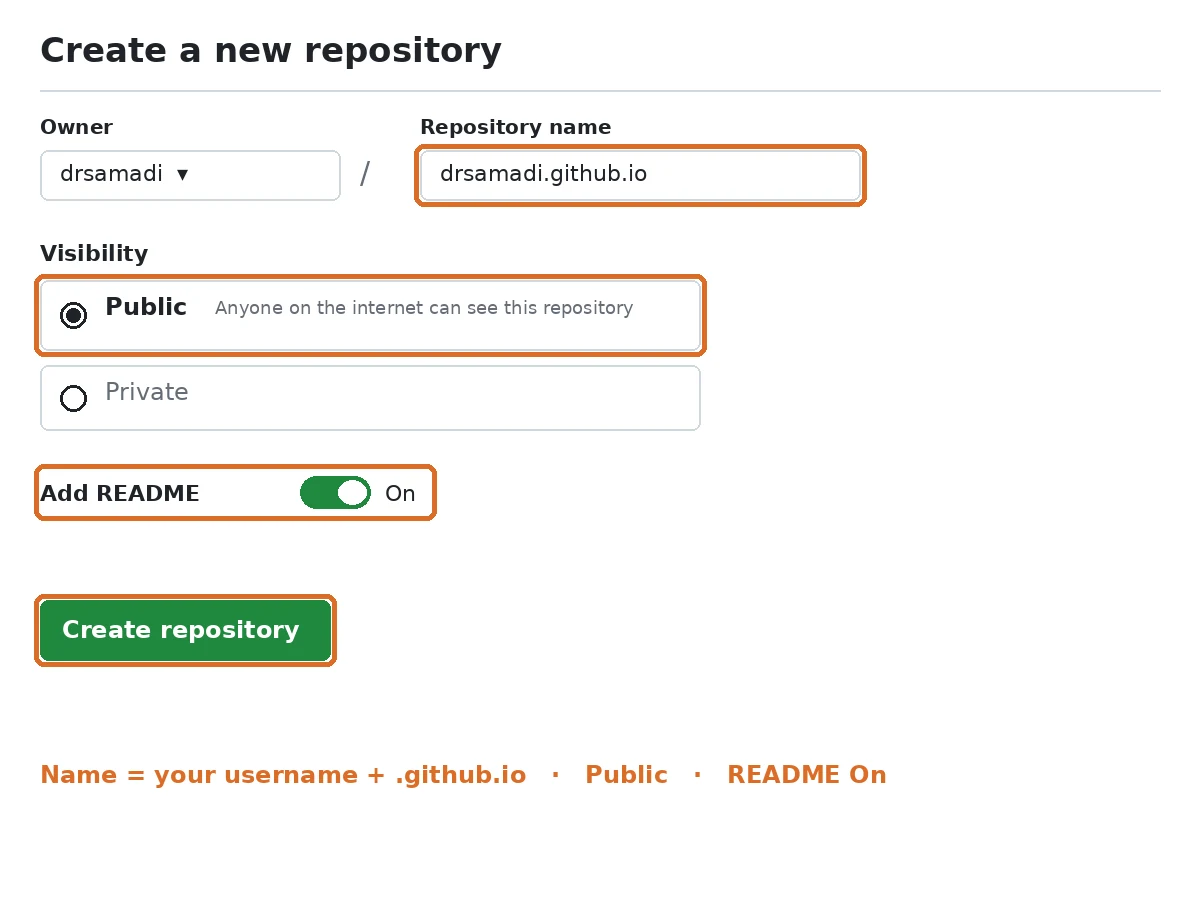
In the repository name box, write your own username followed by .github.io, all in lowercase. For example, if your username is drsamadi (a hypothetical example), the repo name becomes drsamadi.github.io. This name is a fixed convention in GitHub: a repo with this name gets its site built at that same address. DentCast’s site repo is also named dentcast-hub.github.io.
A little further down, in the Visibility section, choose Public. On the free plan, GitHub builds a site only from a public repo. Public means anyone can see this repo’s files. That is not a problem for a website, because everything that goes on a website is visible to everyone anyway. Just remember never to put personal files, patient information or passwords in this repo.
Turn on the Add README option too. A README is a small introductory file that GitHub creates itself, and you will use it right away. Then click Create repository.
Turn the site on
The repo has been created, but there is no site yet. A repo is only a place to keep files, and until you turn on one setting, GitHub does not build a site from it.
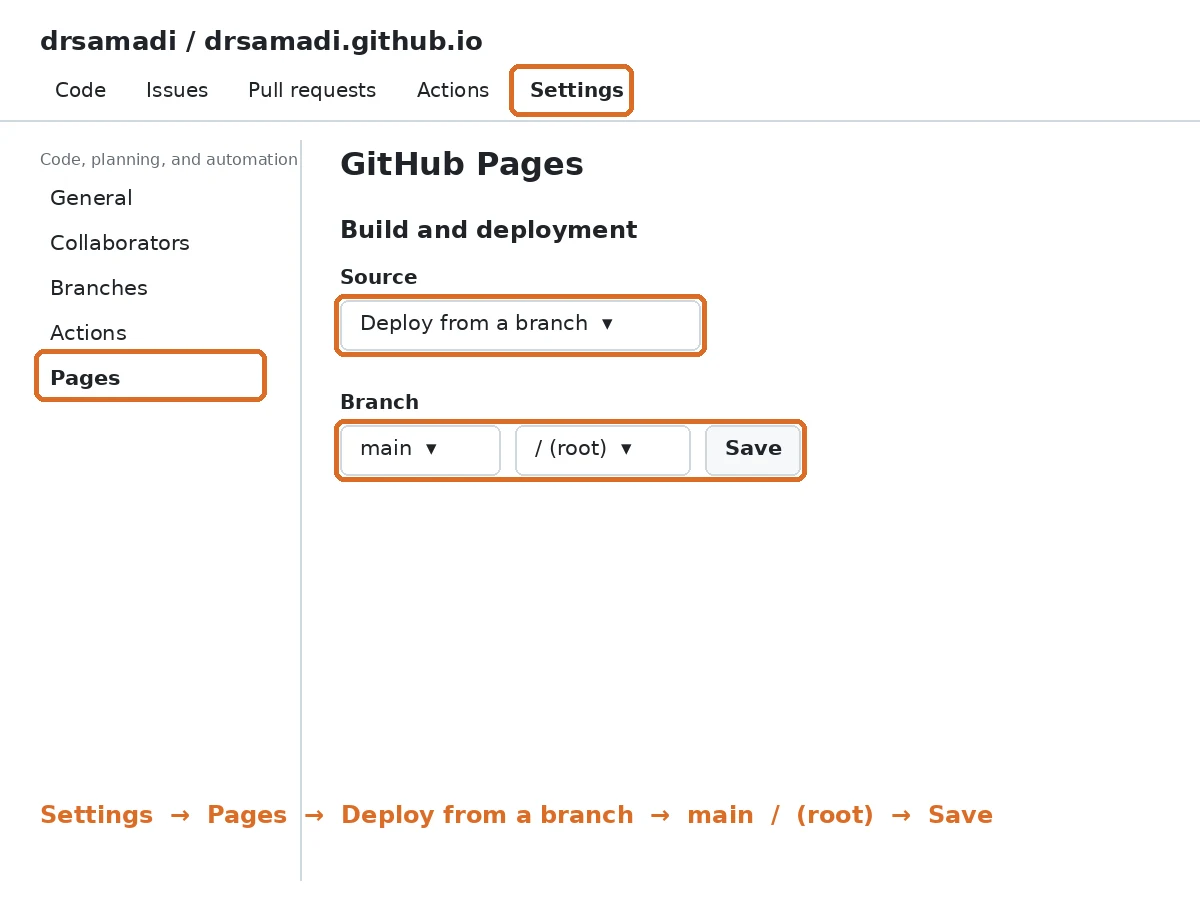
On the repo page, click Settings at the top. In the side menu, find Pages and open it. Under Build and deployment, set Source to Deploy from a branch. Below it, next to Branch, choose main and next to it / (root), and click Save.
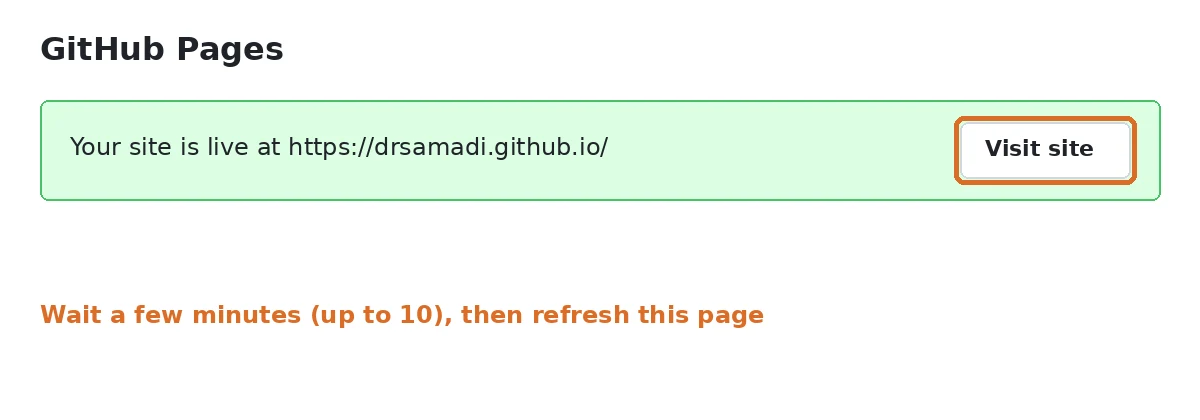
Now wait a few minutes; it may take up to ten minutes. Then open this same page again. At the top of the page you will see a sentence saying your site is live on the internet, with a Visit site button.
This setting is done only once. From now on, any file added to the repo or changed in it will show up on the site automatically a few minutes later.
Open the site on your phone
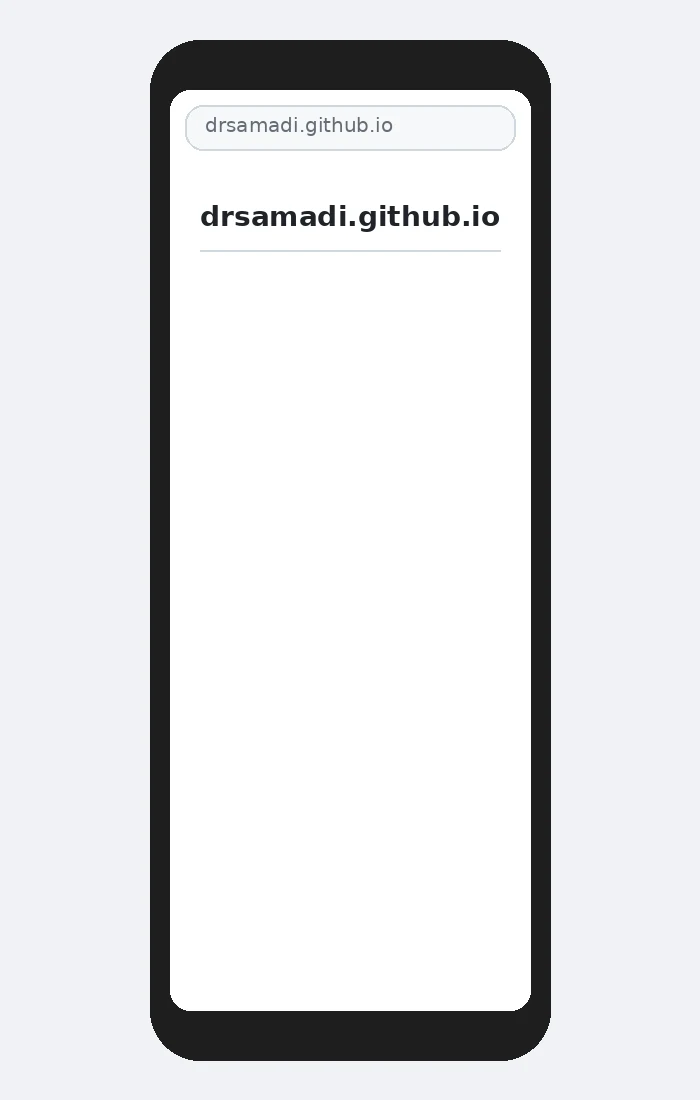
Open your site’s address on your phone, for example https://drsamadi.github.io
You will see a very simple page with only the repo name written on it. This is the README file; when a site has no other page yet, GitHub shows this. How it looks does not matter for now. What matters is that, from this moment, you have a real website that opens on the internet.
If the github.io address seems long and odd to you, rest assured; your site’s name is not going to stay this. This address is only so that you can see the site yourself, and you do not send it to patients. Once you connect the domain you registered in your own name to the site, patients will open the site with that domain.
You did it right if:
- The repo name is “your username.github.io” and the repo is public;
- The site address opens on your phone and shows the repo name.