
Insight 111 — Implant Impressions: Open Tray vs Closed Tray
The main difference between open tray and closed tray is where the coping stays after the material has set. In the open-tray technique the coping comes out of the mouth with the impression, which is called the pick-up technique. In the closed-tray technique the coping stays in the mouth and is then put back into the impression, which is called the reposition technique. This difference determines where error can enter the work.
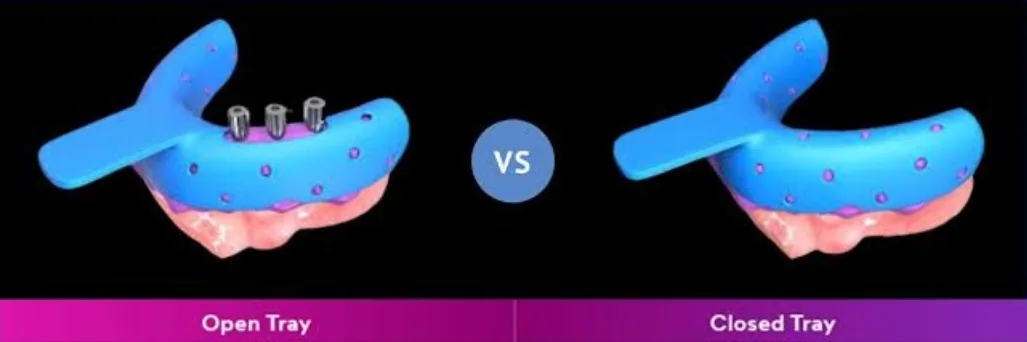
Open tray: the coping comes out with the impression
We fasten the coping to the implant and try in the tray to make sure that the guide screw protrudes through the opening of the tray and does not touch its edge. We usually place a layer of wax or a thin sheet over the opening so that the head of the screw passes through it and the material does not escape. After the material has set, we locate the screw heads, unscrew the screws completely and remove the tray. The copings remain fixed inside the impression, and the analog is screwed directly onto them.
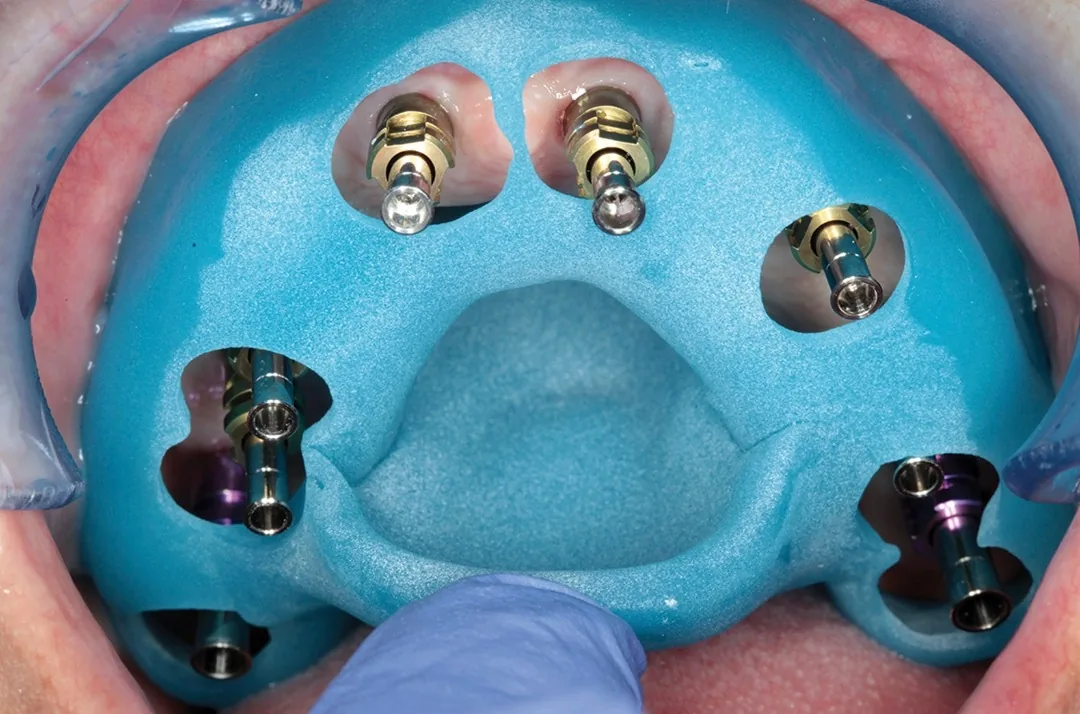
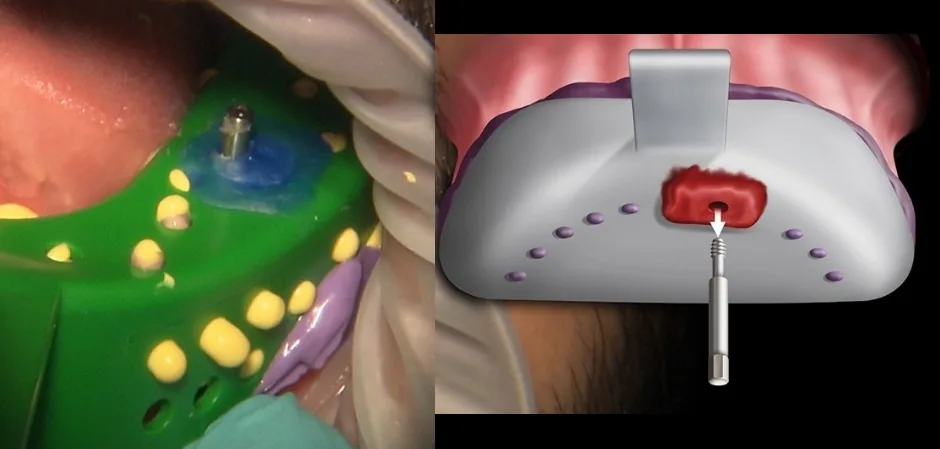
The main advantage of this technique is that the coping never separates from its place in the impression, so the position recorded by the material is the same position that reaches the analog. That is why, in multi-implant cases, where the error of each implant affects the passive fit of the whole prosthesis, open tray is the usual choice.
For implants that are angled relative to each other, an open-tray impression is also the preferred choice. In the closed-tray technique the impression has to be pulled off the copings, and when the copings are not parallel, the material stretches over them on removal and distorts. In the open-tray technique the screws have been undone before removal and the copings come out with the impression, so this stretching does not occur.
In an implant placed deep, a large part of the coping lies within the soft tissue and only a small part of it is recorded in the material. In the closed-tray technique this means that the coping’s seat in the impression is shallow and repositioning it is not accurate. In the open-tray technique the coping is locked in the material and does not need to be put back.
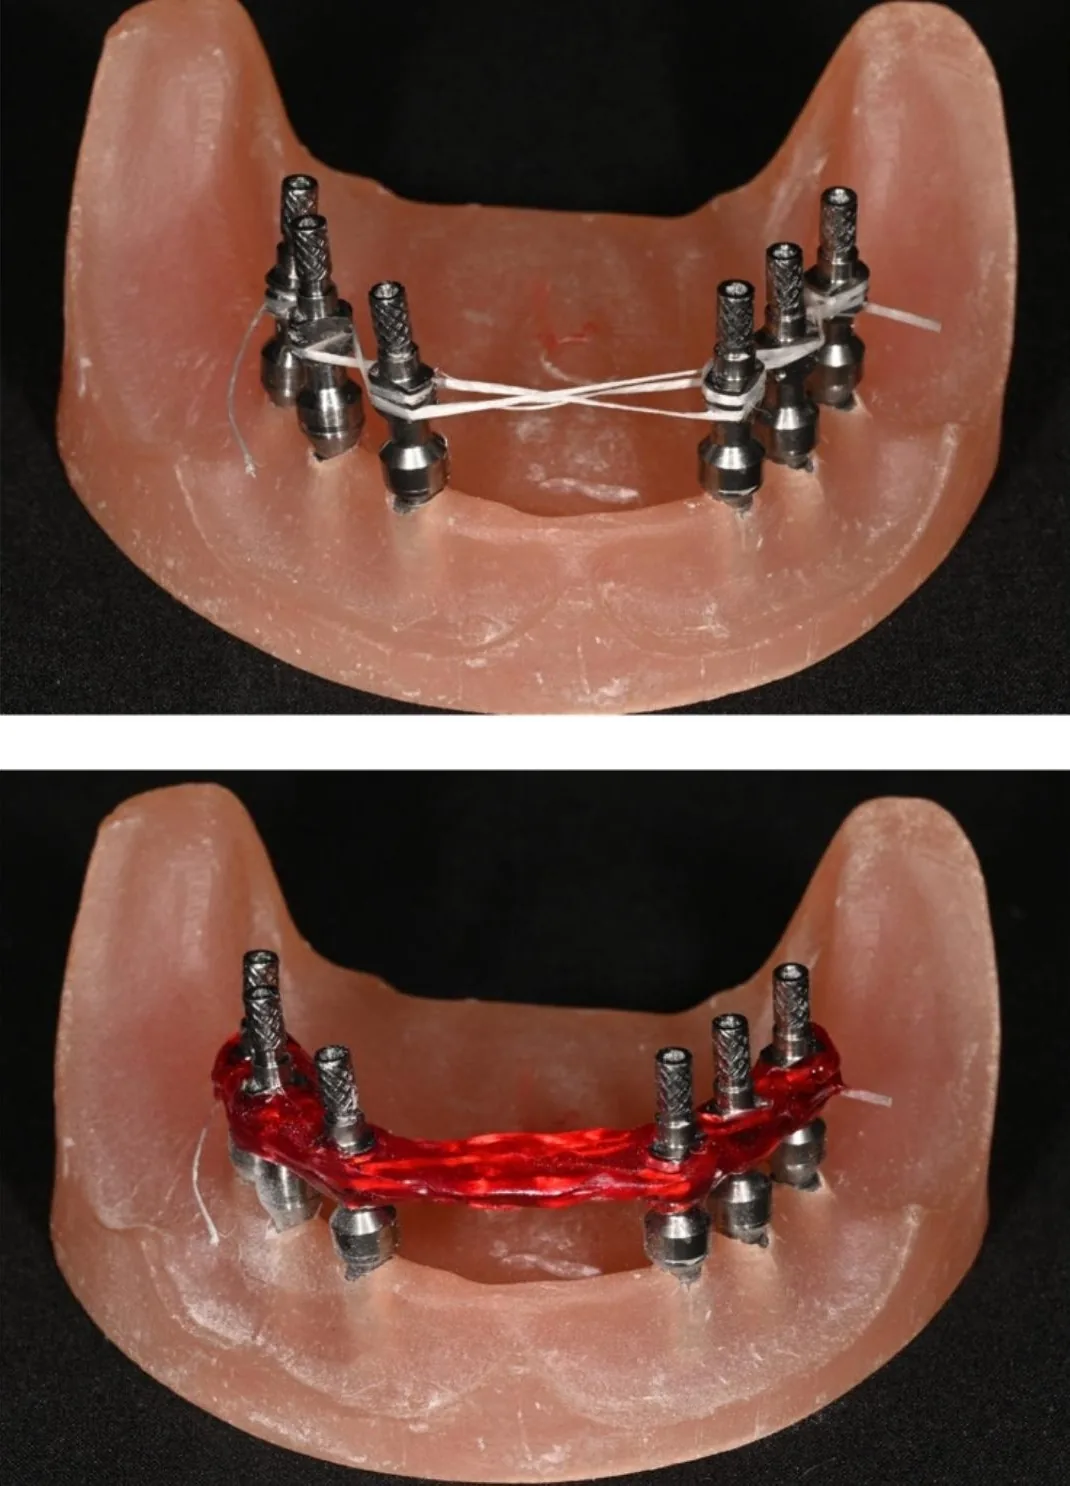
Another option open tray offers is splinting. In multi-implant and especially full-arch cases, we connect the copings to each other with acrylic resin before the impression so that they do not shift relative to each other when the impression is removed and the analogs are screwed on. Resin shrinks as it sets, so the splint is usually sectioned after setting and reconnected with a small amount of resin. In the closed-tray technique splinting is not possible, because the copings have to stay in the mouth separately.
The limitation of open tray is mostly space. The guide screw is long and must both protrude from the tray and be reachable by the implant driver. In the posterior region and in a patient with limited mouth opening this is difficult and sometimes impossible. Preparing the tray, finding the screw heads under the material and unscrewing them also take more time, and a patient with a gag reflex tolerates this period less well.
Closed tray: the coping stays in the mouth
We fasten the coping to the implant and, if the system has a plastic cap, we place the cap on it. The tray is a standard one and needs no openings. After the material has set, we remove the tray directly and the coping stays in the mouth. We then unscrew the coping, attach it to the analog outside the mouth and put the assembly back in its place in the impression, so that the flat surface of the coping matches its seat in the impression and the coping is fully seated. If it has a cap, the cap has stayed in the impression and the coping snaps into it.
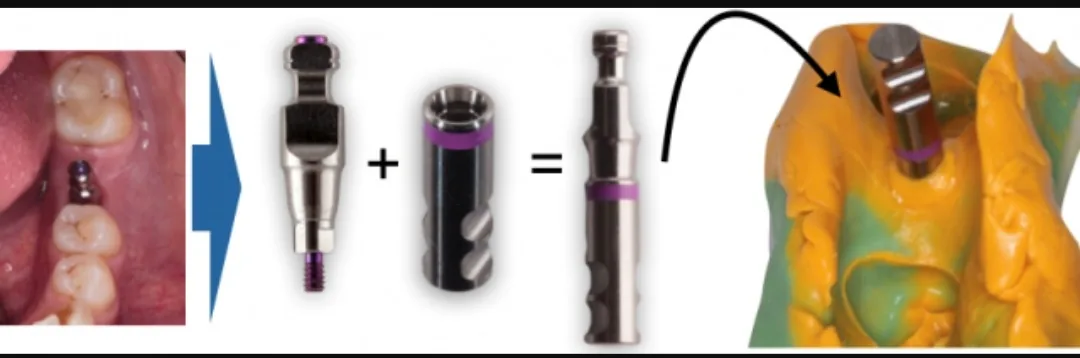
The advantage of closed tray is simplicity. A stock tray works without modification, little vertical space is needed and the impression takes less time. That is why it is easier in the posterior region, in a patient with limited mouth opening and in a patient with a gag reflex.
Its limitation lies in the repositioning step itself. The coping may not seat completely, may rotate slightly, or the material around its seat may deform slightly when pressed. With a single implant, the prosthesis is not connected to another implant and the issue of passive fit between several implants does not arise, so closed tray is usually sufficient. With several implants, each repositioning has its own error and these errors add up.
Comparison
| Open tray | Closed tray | |
|---|---|---|
| Coping after the impression | Comes out with the impression (pick-up) | Stays in the mouth and is put back (reposition) |
| Tray | With openings over the implants | Standard tray |
| Main source of error | Displacement of the copings relative to each other (reduced by splinting) | Repositioning the coping in the impression |
| Space needed | Large | Small |
| Splinting the copings | Possible | Not possible |
| Indications | Multiple implants, full arch, unfavorable angulation, deep implant | Single implant, posterior region, limited mouth opening, gag reflex |
Transferring the same information without impression material, using a scan body, is the subject of the next part.
This page is intended for educational use by dentists and dental students.